January 20, 2013

Comfort Food

My ultimate comfort food is congee (粥), especially when the weather is cold.  It's smooth consistency and gentle flavours are especially soothing when I'm feeling under the weather and in need of something light and comforting.  The most basic version of plain congee is a blank template - ingredients and condiments can be added to create the flavour that you desire, and the result is an infinite number of flavour combinations.  It's no wonder there are restaurants dedicated to serving congee.

Congee varies considerably depending on the region.  I grew up eating Cantonese-style congee (廣東粥), in which the rice is completely married with the water, resulting in a delightfully smooth texture that is not too thick and not too thin.  Chiuchow-style congee (潮州粥), on the other hand, is very thin and more akin to cooked rice in broth, since both elements remain completely separate.  Fujian-style congee (福建粥) is the complete opposite, and often thick enough to eat with chopsticks.

When I was growing up, my mom would cook congee either on the stovetop or in the rice cooker.  Cooking it on the stovetop is the most traditional way to do it, but requires a watchful eye and some skill to ensure that the rice does not stick to the bottom of the pot over the course of the cooking.  I confess that I haven't had much experience cooking congee this way.  I used to always cook it in the rice cooker, which takes advantage of the "porridge" setting, and also allows the congee to continue cooking slowly while it is in the "keep warm" mode overnight.  I much prefer making congee this way because it is completely hands-off and requires minimal effort on my part.  In recent years, I've discovered that the slow cooker is an even better way to slow cook congee over the course of 8-10 hours, and I'm very pleased with the results.   

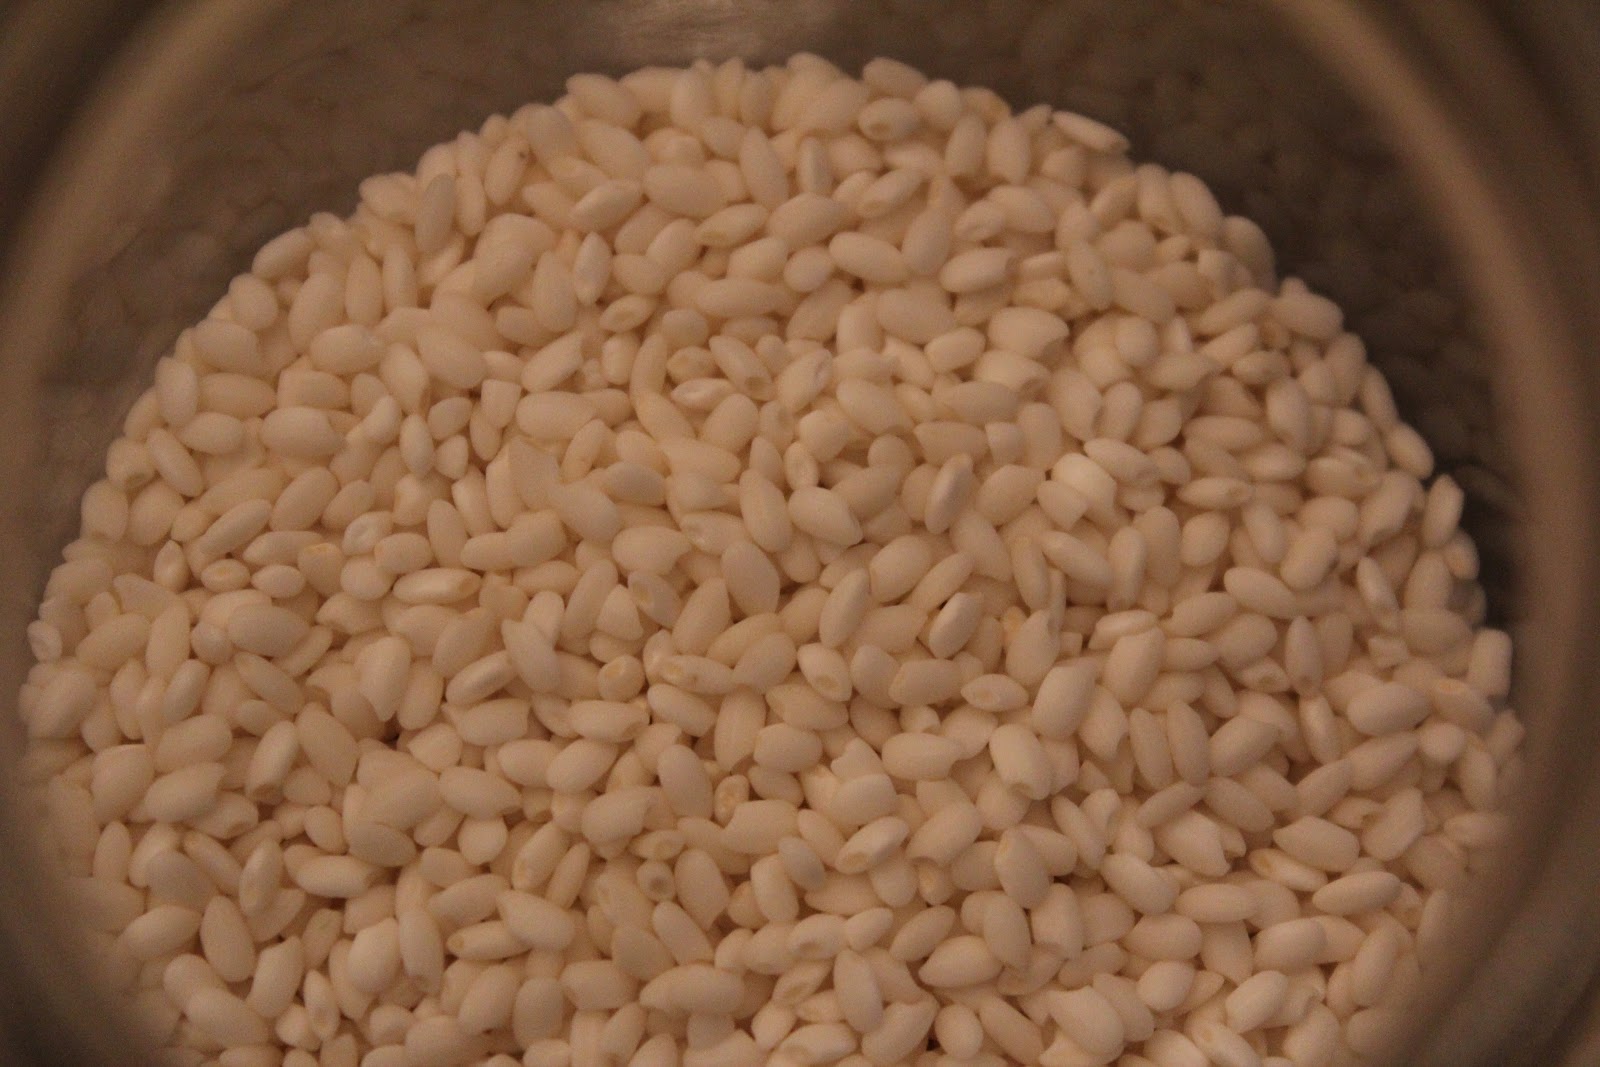
There are three basic elements to making congee: the rice, the cooking liquid, and the flavouring.  I find that using 2 parts long-grain white rice and 1 part short-grain white rice (eg. glutinous rice or Japanese sushi rice) creates the smoothness that I personally prefer.  I have also substituted half of the long-grain rice with brown rice on occassion.  The most basic cooking liquid to cook congee is water, however, chicken broth, shrimp broth (made from boiling shrimp shells in water for about 10 minutes), and the soaking liquid of dried seafood (eg. dried scallops, abalone, etc.) can help add flavour the the congee.  Most of the flavour comes from any additional ingredients that are added to the congee, which can include fresh meat, leftover carcass or bones, fresh or dried seafood, offal, preserved duck eggs, nuts, vegetables, etc.  Since seafood requires minimal cooking time, the best way to prepare seafood congee is to prepare a plain congee base first, and then cook the seafood in the base just before serving.  Even in such little time, the natural sweetness of the seafood will permeate the congee.   

My favorite congee flavours are chicken and shitake mushroom, chicken and abalone (picture below), seafood, and turkey (using the leftovers bones from a roast turkey Thanksgiving or Christmas meal).  My favorite time to make slow cooker congee is on Friday night just before I sleep because it means that I'll wake up to the wonderful aroma of congee, and the congee is ready to eat for Saturday breakfast, brunch, or lunch!


Chicken and mushroom congee ()  (Makes 10 bowls)
2/3 cup long-grain white rice (using the rice measuring cup)
1/3 cup short-grain white rice (using the rice measuring cup)
10 cups water
2-3 chicken breasts, bone-in, skinless
8-10 dried shitake mushrooms, soaked in water overnight
Sesame oil
Sugar
Light soy sauce (生抽)
Maggi soy sauce
2 scallions, finely chopped

1) Rinse rice well, and put it in the insert of a slow cooker.
2) Combine sesame oil, sugar, and light soy sauce in a bowl, and marinate the chicken breasts for a few minutes.
3) Meanwhile, drain the mushrooms, and discard the soaking liquid.  Rinse well under tap water, and squeeze out excess water.  Cut off the mushroom stems, and slice the mushroom caps.
4) Add the chicken, mushroom, and water to the slow cooker insert, and mix well.
5) Set it to cook for 9 hours on low.
6) When the congee is fnished cooking, carefully take the chicken breasts out and place on a small plate.  Remove the bones, and using a pair of chopsticks or a fork, shread the chicken breast.  Season with a few drops of Maggi soy sauce, and add the shredded chicken back into the congee.
7) Add the chopped scallions to the congee, mix well, and serve.
  

July 8, 2012

Mango pudding


Mango pudding (芒果布甸) is a staple dessert at Chinese restaurants.  Cool and refreshing, this dessert is an ideal way to sweeten up a summer's day or evening.  Its texture is similar to creme caramel - smooth, creamy, and semi-firm - not at all like regular vanilla or chocolate pudding.  A drizzle of evaporated milk further enhances the smoothness of the pudding.

Mango pudding can easily be made using store-bought mixes.  However, I find that the pudding is not as a smooth nor rich in mango flavour as I'd like it to be.  Our family recipe for mango pudding uses mango puree and whipping cream to provide a more luxurious and smooth texture.  Frozen or fresh mango cubes can also be added into the mixture for a surprise burst of mango flavour and added texture.


Mango Pudding (Makes enough for one 9"x11" baking dish)
4 cups water (2 cups boiling, 2 cups cold)
1 cup sugar
4tbsp gelatin 
2 cups whipping cream (or light cream)
1 can mango pulp (~750mL)
Optional: frozen or fresh mango cubes
Fat-free evaporated milk (to serve alongside)


1.  Boil 2 cups of water.  Meanwhile, in a bowl, mix sugar and gelatin.
2.  Once water is boiling, turn the heat down to medium.  Slowly add the sugar and gelatin mixture, whisking the entire time until the sugar and gelatin are completely dissolved. 
3.  Remove the sugar-gelatin-water mixture from the heat, and pour it into a large mixing bowl or directly into a 9"x11" baking dish.  
4.  Add 2 cups cold water, mango puree, cream, and mango cubes (if using), and stir to mix well.
5.  If using a 9"x11" baking dish, refrigerate over night and serve directly from the dish.  If using a large mixing bowl, pour into individual molds or bowls, and refrigerate over night.
6.  Serve with evaporate milk and enjoy!


June 27, 2012

East meets west

I really appreciate dishes that authentically represent their cultural heritage, and, as such, I am generally not a fan of fusion cuisine.  However, I recognize that different cuisines have different strengths and limitations, and when paired appropriately, can lead to delicious results.  Case and point: the Asian-inspired salad.

My first encounter with the Asian-inspired salad was the vegetarian Thai noodle salad at Milestone's, which featured salty feta cheese, creamy avocado, tropical papaya, meaty artichokes, sliced mushrooms, crunchy shredded carrots, greens, sesame noodles, and, of course, an Asian-inspired dressing.  


I've made a home-made version of this salad using whole-wheat spaghetti, avocado, Romaine lettuce, mandarin oranges, mango, shredded carrots, sliced bell peppers, shredded roasted chicken breast, and Renee's asian sesame vinaigrette.  This one dish meal is especially refreshing on those hot summer nights when I'm craving something cool and refreshing.


Recently, I was inspired to make another Asian-inspired salad - grilled tofu and orzo salad.  The inspiration for this salad was actually the house-made, Asian-inspired vinaigrette.  I inherited the recipe for the vinaigrette from my colleague, who was initially introduced to it by a friend of her's.  There's something so special about passing along recipes and sharing them among friends.

I normally use soft tofu in my cooking, especially in steamed or braised dishes, as I adore its smooth silky texture.  However, this salad requires a tofu that can withstand more handling and tossing about.  Extra-firm tofu is ideal for grilling, and adds heartiness and substance to the salad.

Tofu is a blank canvas for flavour and easily absorbs the flavours of a marinade or cooking liquid.  To ensure that maximal flavour is incorporated into the tofu for this dish: 

1)  Marinate the tofu overnight, and pierce each piece of tofu to ensure that the marinade is absorbed throughout the tofu.

 
2)  After grilling the tofu, cut it up and let it sit in the original marinade until the salad is ready to be assembled.


Aside from the tofu and orzo, I have made this salad with many different types of vegetables and fruit.  The versatility of salads allows you to tailor the ingredients to your liking (or to whatever vegetables or fruit in the fridge that need to be used up!). 


Grilled Tofu and Orzo Salad

Ingredients  (Serves 8)
2 packages extra-firm tofu
1/2 Romaine lettuce, shredded
1 red bell pepper, diced
2 mangoes, peeled and diced
1-1/2 cups cooked orzo

Tofu Marinade
Light soy sauce (生抽)
Dark soy sauce (老抽)
Sesame oil
Fish sauce  
Sugar 

Vinaigrette
3 cloves garlic, minced
1/3 cup sugar
1/2 cup apple cider vinegar
1/4 cup sesame oil
3/4 cup canola oil
4 tbsp light soy sauce (生抽)
 
1)  Cut tofu into thick strips.  Pierce each strip with the tip of the knife. 
2)  Mix marinade ingredients together, and marinate tofu overnight in the refrigerator.
3)  Grill the tofu strips for 1 minute, flip onto the non-grilled side, and grill for another minute. 
4)  Cut the tofu strips into cubes, and let it sit in the marinade until the salad is ready to be assembled. 
5)  Mix all salad ingredients in a big bowl, and pour as much vinaigrette as needed to dress the salad.
6)  Refrigerate for at least 1 hour before serving.
 

June 24, 2012

Soy sauce chicken

I remember a small, family-run Chinese grocery store that my family used to always go to when I was a child.  In addition to the standard Chinese groceries, the owner also had a section that sold Chinese barbecue items.  My favorite items were curry squid (咖哩魷魚), barbecue pork (叉燒), and soy sauce chicken (豉油雞).  The owners have long since retired, the store has changed ownership and design, and it no longer houses a barbecue section.  To this day, I reminisce about the flavor of their curry squid, and I have not been able to find a recipe or other store that can recreate this taste that I fondly remember.  So often our memories set such high standards for how dishes ought to taste.

Soy sauce chicken is classic Chinese home-cooking.  The chicken is cooked slowly over indirect heat by sitting in a cooked marinade, and as such, retains its tender succulence.    I've tried a variety of recipes, and the following is the one that I enjoy the most.  The recipe is adapted from Annie Leong's (梁許安璞) "At Home with Annie" (安璞.滋味.知).  Annie's version includes an additional step of smoking () the chicken over rice, sugar, and dried rose buds, which I don't normally do. 
 

The name of this dish is misleading because soy sauce is not the sole ingredient used in the marinade.  The base of this marinade is a ready-to-use, bottled chicken marinade developed specifically for soy sauce chicken, and the depth of flavour is further developed with the addition of light soy sauce, dark soy sauce, oyster sauce, rock sugar, two different types of Chinese cooking wine, shallots, ginger, and scallions. The great thing about this marinade is that it can be reused again and again (and kept in the freezer in between uses).  With each time that it the marinade is used, it becomes more flavourful and more concentrated.  


Soy Sauce Chicken (豉油雞)

Ingredients
1 whole chicken (3.5-4lb) or chicken pieces (eg. drumsticks, thighs, or wings)
3 bottles Lee Kee Kum chicken marinade (李錦記豉油雞汁)
1 tsp Chinese "rose" wine (玫瑰露酒, Chinese salted wine made with rose flowers)
4 tbsp Shaoxing wine (紹興酒, Chinese rice wine)
3 tbsp light soy sauce (生抽)
1 tbsp dark soy sauce (老抽)
2 tbsp oyster sauce (蠔油)
3 pieces of rock sugar (冰糖), about the size of pinballs each
6-8 shallots, peeled and smashed with the size of a knife
1 large slice of ginger
1 bundle of scallions, ends trimmed and cut into 3" sections
Oil

1) In a medium-sized pot, heat a bit of oil and sautee the aromatics (shallots, ginger, and scallions) until fragrant.  Add Shaoxing wine.
2) Add all other marinade ingredients to the pot, and mix well. 
3) Add chicken to the marinade, and bring the mixture to a boil uncovered.
4) Once the mixture is heating, cover and turn the heat down to medium.  Simmer for 5 minutes and then turn off the heat.
5) Let chicken cook in the hot marinade, covered, for 1 hour.  Turn the chicken every 20 minutes to allow for even cooking.
6) Remove the chicken or chicken pieces from the marinade.  If using a whole chicken, use kitchen shears to cut the chicken into pieces.
7) Allow marinade to cool, transfer to freezer-safe containers, and keep in freezer.

Note: The next time you want to make this dish, defrost the frozen marinade in the fridge overnight.  The marinade will be of a gelatinous consistency, but will completely melt and thin out upon cooking again.  Prior to using the marinade, skim off any visible fat from the top with a spoon.  Pour the marinade into a medium-sized pot, add the chicken, and follow the same cooking technique as above.    

June 23, 2012

Sweet and Sour Ribs

One of the first dishes that my mom taught me to make was sweet and sour ribs (糖醋排骨).  Tender ribs coated in a sticky sweet and tangy sauce were, and continue to be, a household favorite.  This sweet and sour sauce is not to be confused with the one that normally dons deep-fried nuggets of pork in sweet and sour pork.  That sauce contains white vinegar and ketchup, while the tang in these sweet and sour ribs comes from black rice vinegar or Chinkiang vinegar (鎮江), which is made with black glutinous rice.  The most famous black rice vinegar originated and is still produced in Chinkiang (鎮江), a city in the province of Jiangsu (江蘇), along the eastern coast of China.  


Legend tells that black rice vinegar was invented in the mid-1800s by a man called Hei Ta (黑塔), son of the legendary inventor of Chinese rice wine, Du Kang (杜康).  Du Kang and his family had just moved to Chinkiang and established a distillery outside the city, where they produced and sold wine.  Hei Ta was employed at his father's distillery and helped out with a variety of tasks.  One afternoon, he was working the stables, and had just added a few buckets of water to a large container of rice wine.  Tired and exhausted from the day's work, he drank some of the mixture, and fell asleep in a state of drunkeness.  Suddenly, he awoke to the voice of a smiling elderly gentlemen, who told him that the "nectar" he prepared has now been resting for 21 days, and is ready for consumption in the west.  The gentleman disappeared after speaking these words, and Hei Ta woke up and realized that it was all just a dream.  Puzzled by the gentleman's words, Hei Ta thought to himself, how could the mixture of rice wine and water become nectar?  He took a sip from the container and was pleasantly surprised at the rich and full-bodied flavour of the vinegar that he tasted, and immediately went to tell his father.  They were both puzzled at the gentleman's reference to 21 days and the west (二十一日酉), but when Du Kang combined the words in writing, it became the word "vinegar" (醋).  So, Du Kang and his family begain producing black rice vinegar by adding water to rice wine and allowing it to ferment for 21 days.  They gave the vinegar to their neighbors, who all enjoyed it, and not long after, customers came to the distillery asking to buy the vinegar.  Du Kang and his family began selling this vinegar all throughout the city of Chinkiang, and word travelled throughout the country about this famous black rice vinegar.  To this day, the factories in Chinkiang that produce this vinegar still allow for a 21 day fermentation period.


Sweet and Sour Pork Ribs (糖醋排骨)
Pork ribs, cut into individual ribs
2 tbsp Chinkiang black rice vinegar (鎮江醋)
2 tbsp light soy sauce (生抽)
3 tbsp sugar
3 tbsp water
1-2 scallions, finely chopped

1)  Bring a pot of water to boil and add ribs.  Bring to a boil again, turn heat down to medium-high, and simmer for about 45 minutes.
2)  Meanwhile, in a bowl, mix together the vinegar, soy sauce, sugar, and water.
3)  When the ribs are cooked, drain the ribs and leave them in the pot
4)  Add the sweet and sour sauce mixture to the ribs, and bring to a gentle boil over medium-high heat, turning occassionally until all the ribs are coated in the mixture.
5)  Keep the sauce on a gentle boil until it is slightly thick and sticky.  Watch closely so that the sauce does not burn.  Turn off the heat, transfer the ribs to a plate, and pour the remaining sauce over top.  Sprinkle with chopped scallions.   

Note:  The portion size of the sauce can always be increased proportionally, depending on the amount of ribs that are being cooked.  This sauce is very versatile - it can also be used to make sweet and sour pan-seared pork chops with caramelized onions (糖醋洋蔥豬扒), and sweet and sour pan-seared lamb chops (糖醋羊扒), as pictured below.  


April 23, 2012

Nom Nom Nom

I adore the soft, chewy texture of dishes that are made with glutinous rice (糯米), and one of my favourite dishes is stir-fried glutinous rice (生炒糯米飯).  My grandma taught me how to cook this dish at T&T several years ago.  To be more specific, I was buying groceries at T&T one day, and had a sudden craving for homemade stir-fried sticky rice.  My parents were on vacation, so I decided to call the person who taught my mom how to make this dish, my grandma in Hong Kong.  Though separated by distance and time, my grandma passed on her recipe to me, and I still think of her everytime I make this dish.  

The technique for making stir-fried glutinous rice is similar to making risotto.  Neither dish is difficult to make, but both require time and patience.  Both dishes involve first sautéing short-grain rice briefly with aromatics, and then cooking the rice slowly by gradually stirring in flavoured liquid to the rice.  In making stir-fried glutinous rice, the flavoured liquid that I use is simply the water that was used to soak the dried scallops and dried shrimp.  Unlike risotto, the texture of stir-fried glutinous rice is more sticky than creamy, but it is equally as delectable and satisfying as its Italian counterpart.


Ingredients  (serves 4-6 people) 
1-2 dried scallops (乾瑤柱), soak in water overnight 
1/2 cup medium or large dried shrimp (蝦米), soak in water overnight
10-12 dried shitake mushrooms, soak in water overnight
4 cured Chinese sausages
1-1/3 cups glutinous rice (or 2 cups, if you are using the rice measuring cups), rinse and drain
Lee Kum Kee seasoned soy sauce for seafood (李錦記豉油)
1-2 scallions, finely chopped 
Water
Oil
 

1)  Drain the dried scallops and reserve the soaking liquid.  Using your fingers, separate the scallops into strands and set aside.
2)  Drain the dried shrimp and reserve the soaking liquid.  Chop the shrimp finely and set aside.
3)  Drain the shitake mushrooms and discard the soaking liquid.  Rinse under tap water to clean and squeeze out any excess water.  Cut and discard the mushroom stems, dice the mushroom caps, and set aside.
4)  Dice the cured Chinese sausages, and set aside.     
5) Heat a bit of oil in a non-stick frying pan over medium-high heat.  Stir-fry dried scallop and dried shrimp for about 1 minute until it is fragrant.  Add glutinous rice and stir-fry for about 1-2 minutes.
6) Add 1 cup of reserved soaking liquid to the rice, and stir-fry occassionally until water is fully absorbed by the rice.
7) Add another cup of the reserved soaking liquid to the rice, and stir-fry occassionally until the liquid is fully absorbed by the rice.
8) Add shitake mushrooms and cured Chinese sausage, and stir-fry rice for about 1 minute.  Add another cup of the reserved soaking liquid to the rice, and stir-fry occassionally until the liquid is fully absorbed by the rice. 
9)  Keep adding the reserved soaking liquid (or water, once you use up all the soaking liquid), one cup at a time and stir-frying until the liquid is fully absorbed by the rice before adding the next cup of liquid.  Over time, the rice will start becoming translucent around the edges of each granule.  The rice is cooked when it is fully translucent.  You can also taste test as you go along to check for doneness - make sure that the rice is completely soft and chewy throughout the granule, and not hard in the middle.  Be careful not to add too much liquid, or the rice will become soggy.
10) Add the scallions and soy sauce for taste, and stir-fry the rice to incorporate both ingredients. 


April 22, 2012

Quick Quick Slow

For me, the aroma of slow-cooked Chinese soup (老火湯) simmering on the stove always evokes a sense of calm and comfort around the home.  Growing up, this aroma was often associated with quiet afternoons at home, when I would hear the gentle humming of the washer or dryer as laundry was being done, or the distant buzz of a lawnmower outside, accompanied by the occassional crackle of the weekend paper as a page was turned.  Even now as I am quietly working, I am comforted by the sound of the murmuring kitchen fan as the fragance of the soup, gently cooking on the stove, wafts throughout the house.  

Slow-cooked Chinese soup has long been a staple of Cantonese cuisine and of my home.  These broths can be made with a multitude of ingredients, including fresh and dried fruits and vegetables, meat, seafood, and Chinese herbs.  Countless books have been written on the health benefits of different types of soups, but my personal favorites are those made with fresh fruits and vegetables.  The literal translation of 老火湯 is "old (or long) fire soup", meaning that it usually requires a long cooking process.  I borrowed the title of this post "quick quick slow" from a chapter of Nigella Express in which Nigella Lawson shares recipes that require a short preparation time followed by a lengthier cooking time.  It seemed fitting, since this is precisely what slow-cooked Chinese soup entails.  The preparation of ingredients often does not involve much more than washing and cutting, while the actual simmering of the soup often takes a few hours. 

When my husband and I were visiting my grandma in Hong Kong a few years ago, she made a slow-cooked carrot and corn soup, which has now became my husband's favourite soup.  Corn isn't in season yet, so I've been making carrot and green radish soup lately, which is a classic soup that I grew up drinking. 

There are a few additional "secret" ingredients that help to heighten the flavour of this soup.  Dried scallop or conpoy (乾瑤柱), which is considered a Chinese delicacy, helps to enhance the natural sweetness of this soup.  The dried scallops that I use are of Japanese origin - I use them sparingly now since the price of Japanese-produced dried seafood has skyrocketed since last year's tsunami.  They do require soaking before making the soup, and both the rehydrated scallop and soaking liquid are used to flavour the soup. 

Meat adds richness to the soup, so I use boneless pork shank (豬腱), fresh duck gizzards (鴨腎, part of the duck giblets), and cured duck gizzards (臘鴨腎).  The cured duck gizzards add a natural savouriness to the soup, and are processed in a similar way as Chinese cured sausages (臘腸).   Finally, I add dried fruit to lend some natural sweetness to the soup: dried longan (圓肉) and dried honey dates (蜜棗).  Both plump up as the soup slowly simmers. 
Once the ingredients have been prepared, the hardest part about cooking the soup is being patient, especially as the delicious aroma of the soup entices you over the next few hours!  I grew up drinking soup that was slowly simmered over the stove, and that is how I continue to prepare my soup today.  I'm slightly less patient than my mom, since I've reduced the simmering time for my soups from 3 hours to 2 hours.  Simmering soup on the stove for hours is time-consuming and not very energy-efficient, and there are many greener options these days, such as the ever popular thermal cooker (真空煲).  I personally still prefer the old-fashioned, stove-top method as the soup is able to slowly condense and concentrate while simmering away on the stove, and the resulting flavour is more rich and full.  Whichever way you enjoy preparing this slow-cooked soup, there is no doubt that you will be rewarded with a delicious bowl of comfort, warmth, and tradition.

Carrot and Green Radish Soup (青紅蘿蔔湯)     

Ingredients:
4 medium carrots (紅蘿蔔)
1 medium green radish ((青蘿蔔)
1 dried scallop (乾瑤柱), soak in water overnight
1/2 boneless pork shank
4-6 fresh duck gizzards (鴨腎)
1 large cured duck gizzard (臘鴨腎) 
Small handful of dried longan (圓肉)
2 dried honey dates (蜜棗) 
Salt to taste

1)  Rinse all ingredients.  Peel and cut carrots and green radish.
2)  Using your fingers, roughly separate the rehydrated scallop into strands.  Add the scallop strands and soaking liquid to a pot, and fill with water until about 60% full.
3)  Bring water to a boil, and add all other ingredients.
4)  Bring the soup to a boil, turn the heat down to medium-high, and simmer for 1 hour.
5)  After 1 hour, turn the heat down to medium, and simmer for another 1 hour.
6)  Add salt to taste, and enjoy!

April 21, 2012

Food as Tradition and Culture

Food is one of the joys in my life - I love to eat it, cook it, look at it, converse about it, and read and learn about it.   

Growing up as a child, I was nourished on my mom's delicious home-cooking.  As a grown woman and wife, I have come to appreciate the family heritage and cultural traditions that are infused into my mom's cooking.  My mom learnt to cook many of her signature dishes from my grandma (who is also a great cook), and she has since passed on these recipes to me.  Perhaps this is why I especially love cooking traditional Chinese dishes so much - it's a vital way for me to participate in and preserve the traditions of my family and culture. 


So, here I am, sharing about the food that I love to cook and eat, from my kitchen to yours!